

Share and Reuse Environments
Your coworker is starting a new project but needs the same environment you’ve been using. They’re on a different machine, maybe even a different OS. How do you share your exact setup with them?
This example walks through the full publish-and-consume workflow: Alice creates and publishes an environment, and Bob downloads and runs it with no manual setup needed.
Here’s a visual overview of the workflow:
graph LR
    subgraph Alice
        direction TD
        A["Create env"] --> C["Publish"]
    end
    C --> R[("OCI Registry")]
    R --> D
    subgraph Bob
        direction TD
        D["Import"] --> E["Run"]
    end
What You’ll Need
Section titled “What You’ll Need”- Nebi CLI installed
- Pixi installed
- A configured OCI registry (see Registry Setup)
Alice: Create and Publish the Environment
Section titled “Alice: Create and Publish the Environment”Clone the example to follow along with this tutorial:
git clone https://github.com/nebari-dev/nebi.gitcd nebi/docs/examples/data-science-demonebi initStep 1: Create the workspace
Section titled “Step 1: Create the workspace”Alice creates a data science environment with Python, scikit-learn, and Streamlit. Here’s her pixi.toml:
[workspace]name = "data-science-demo"channels = ["conda-forge"]platforms = ["linux-64", "linux-aarch64", "osx-arm64", "osx-64"]version = "0.1.0"
[dependencies]python = ">=3.11"scikit-learn = ">=1.4"streamlit = ">=1.30"
Step 2: Add code and tasks
Section titled “Step 2: Add code and tasks”Alice writes the training code in train.py:
from sklearn.datasets import load_irisfrom sklearn.tree import DecisionTreeClassifierfrom sklearn.model_selection import train_test_splitfrom sklearn.metrics import accuracy_score, confusion_matrix
X, y = load_iris(return_X_y=True)X_train, X_test, y_train, y_test = train_test_split(    X, y, test_size=0.3, random_state=42)
model = DecisionTreeClassifier(random_state=42)model.fit(X_train, y_train)
y_pred = model.predict(X_test)print(f"Accuracy: {accuracy_score(y_test, y_pred):.2f}")cm = confusion_matrix(y_test, y_pred)print("Confusion Matrix:")print(cm)
And a Streamlit app for interactive predictions in app.py:
import streamlit as stfrom sklearn.datasets import load_irisfrom sklearn.tree import DecisionTreeClassifier
iris = load_iris()model = DecisionTreeClassifier(random_state=42)model.fit(iris.data, iris.target)
st.title("Iris Species Predictor")features = [    [        st.slider("Sepal length", 4.0, 8.0, 5.8),        st.slider("Sepal width", 2.0, 4.5, 3.0),        st.slider("Petal length", 1.0, 7.0, 4.0),        st.slider("Petal width", 0.1, 2.5, 1.2),    ]]st.subheader(f"Predicted: {iris.target_names[model.predict(features)[0]]}")
Alice wires the scripts up as named tasks in pixi.toml so they can be run with a short command (pixi run train, pixi run app):
[tasks]train = "python train.py"app = "streamlit run app.py"Alice installs the environment to generate the lock file:
pixi installThis creates pixi.lock, which pins the exact package versions for reproducibility.
She can then verify the tasks work locally by running the training task:
pixi run trainAccuracy: 1.00Confusion Matrix:[[19 0 0] [ 0 13 0] [ 0 0 13]]Or launch the Streamlit app:
pixi run app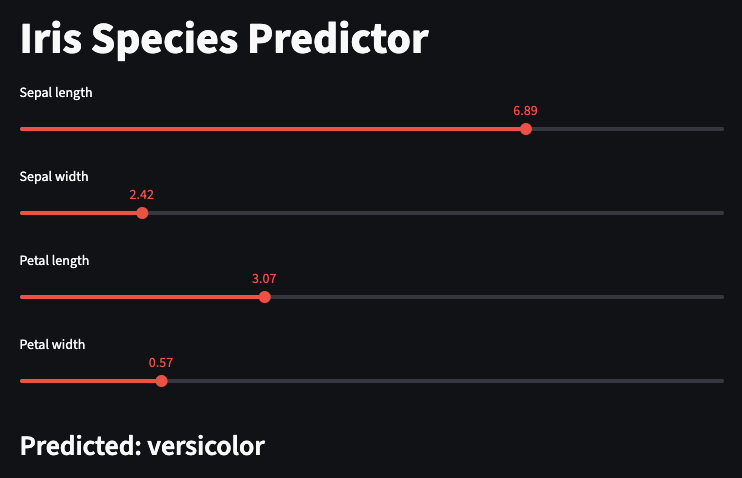
Alice’s workspace now looks like this:
.├── README.md├── app.py├── pixi.lock├── pixi.toml└── train.pyStep 3: Publish to an OCI registry
Section titled “Step 3: Publish to an OCI registry”Before publishing, configure a default registry (see Registry Setup for details):
nebi registry add \ --default \ --name <name> \ --url <url> \ --namespace <namespace> \ --username <username>For example, here’s how it looks with Docker Hub:
nebi registry add \ --name dockerhub \ --url docker.io \ --namespace alice \ --username alice \ --defaultPassword:Added local registry 'dockerhub' (docker.io)Then publish. The --tag sets the version and --repo names the repository:
nebi publish data-science-demo --tag v1.0 --repo data-science-demoExample output with Docker Hub:
Published docker.io/alice/data-science-demo:v1.0 (digest: sha256:...)The bundle now lives at docker.io/alice/data-science-demo:v1.0 and contains every file from Alice’s workspace: pixi.toml, pixi.lock, train.py, app.py, README.md.
Bob: Download and Run the Environment
Section titled “Bob: Download and Run the Environment”Bob doesn’t need to know what packages Alice chose or how the environment was built. He just needs one command.
Import from the OCI registry
Section titled “Import from the OCI registry”To recreate Alice’s environment locally, Bob just needs to import the bundle:
nebi import <url>/<namespace>/data-science-demo:v1.0For example, with Alice’s Docker Hub registry, the command would be:
nebi import docker.io/alice/data-science-demo:v1.0This restores all of Alice’s workspace files into the current directory at their original relative paths:
.├── README.md├── app.py├── pixi.lock├── pixi.toml└── train.pyRun the task
Section titled “Run the task”Now that Bob has the environment, he can run the training task:
pixi run trainAccuracy: 1.00Confusion Matrix:[[19 0 0] [ 0 13 0] [ 0 0 13]]Or launch the Streamlit app:
pixi run appWhat Just Happened
Section titled “What Just Happened”Here’s the full flow at a glance:
| Step | Who | Command |
|---|---|---|
| Create workspace | Alice | nebi init + pixi add |
| Add tasks | Alice | Edit pixi.toml |
| Publish to OCI | Alice | nebi publish |
| Import environment | Bob | nebi import |
| Run task | Bob | pixi run train |
With Nebi, Bob gets the same packages, the same versions, the same project files, and the same results as Alice without any manual setup.